Showing posts with label Cooking. Show all posts

Sunday, October 2, 2011

How to Win Friends and Influence People: Make this Artichoke-Crusted Chicken

This is one of my all-time favorite recipes, and I'm sharing it with you! I originally stumbled upon this at a blog called rainy day gal, but the original credit goes to SugarLaws. Thanks to both ladies for sharing this incredible recipe. I know I'll be making it time and again - why don't you give it a shot?


As the title of the post suggests, this dish is insanely delicious (yet also extremely simple and easy to put together). Make it for date night, to impress your parents, to make your roommate forget about all the dirty dishes you left in the sink last week, or just all for yourself because you're that special! 

Here's what you'll need (Serves 4)
  • 2 large boneless, skinless chicken breasts (about 1.25 lbs)
  • 6 0z marinated artichoke hearts (small jar), drained and chopped
  • 3 Tbsp mayonnaise 
  • 1/8 cup mozzarella cheese 
  • 1 Tbsp olive oil
  • Salt 
  • Fresh cracked black pepper
  • Red pepper flakes   
 

Step 1: Rinse your chicken and pat dry with a paper towel. Set on a cutting board and cover with a piece of cling wrap. Using a meat mallet (or another heavy flat-bottomed object), pound the living daylights out of your chicken breasts until they are flattened. 


Here's what they look like when you're done smashing them. The reason for this is to allow them to cook faster and have more surface area for the artichoke mixture to cling to. 
 

Step 2: Trim off any fat and nasty bits. Slice your breasts in half on the diagonal (yielding 4 equal size pieces). I am counting each 1/2 breast piece as a serving, but if you have a very hearty appetite this recipe will only yield 2 servings.
 

Step 3: Season well on both sides with salt and freshly ground pepper. Sprinkle on a few pinches of red pepper flakes (a little goes a long way - it's SPICY!)


Step 4: Drizzle your Tbsp of olive oil into a large nonstick skillet over medium heat. Allow it to warm up a bit (the oil will get very thin and runny - that's how you know it's hot enough). Preheat your oven to 425.


Step 5: Add your chicken breast halves to the skillet and brown them. My skillet wasn't huge so I only added two halves at a time to avoid crowding the pan. When you add too much food with moisture in it to a cooking surface that's not big enough to accommodate it (overcrowding), the food will end up steaming in it's own juices that are evaporating, instead of browning in the oil. You want it to achieve a nice golden brown crust. 


When the first side gets nice and golden brown, it's time to flip! 


Keep an eye on your chicken, adding more pieces when the first two are almost done. They don't need to be cooked ALL the way through, because they are going in the oven later. Baking in the oven will complete the cooking process - if you cook them all the way through in the skillet, they will get dry and overdone after being in the oven too.


Step 7: While your chicken is cooking on the stove, mix together your artichoke topping. In a small bowl mix 6 oz drained and chopped marinated artichokes, 3 Tbsp mayonnaise, and 1/8 cup mozzarella cheese. You could actually use any white cheese you want, but mozzarella is what I had on hand. White cheddar, parmesan, or romano would also be fantastic! 

Step 8: Try to refrain from eating a bite right off the spoon. I couldn't ;) 


 Step 9: Your breast halves should all be finished browning at this point, and be mostly cooked (a teeny bit of pink in the center is fine). Arrange them in a row on a foil-lined baking sheet and spread a large dollop of the artichoke mixture on top. Don't let any go to waste, just pile it all on.


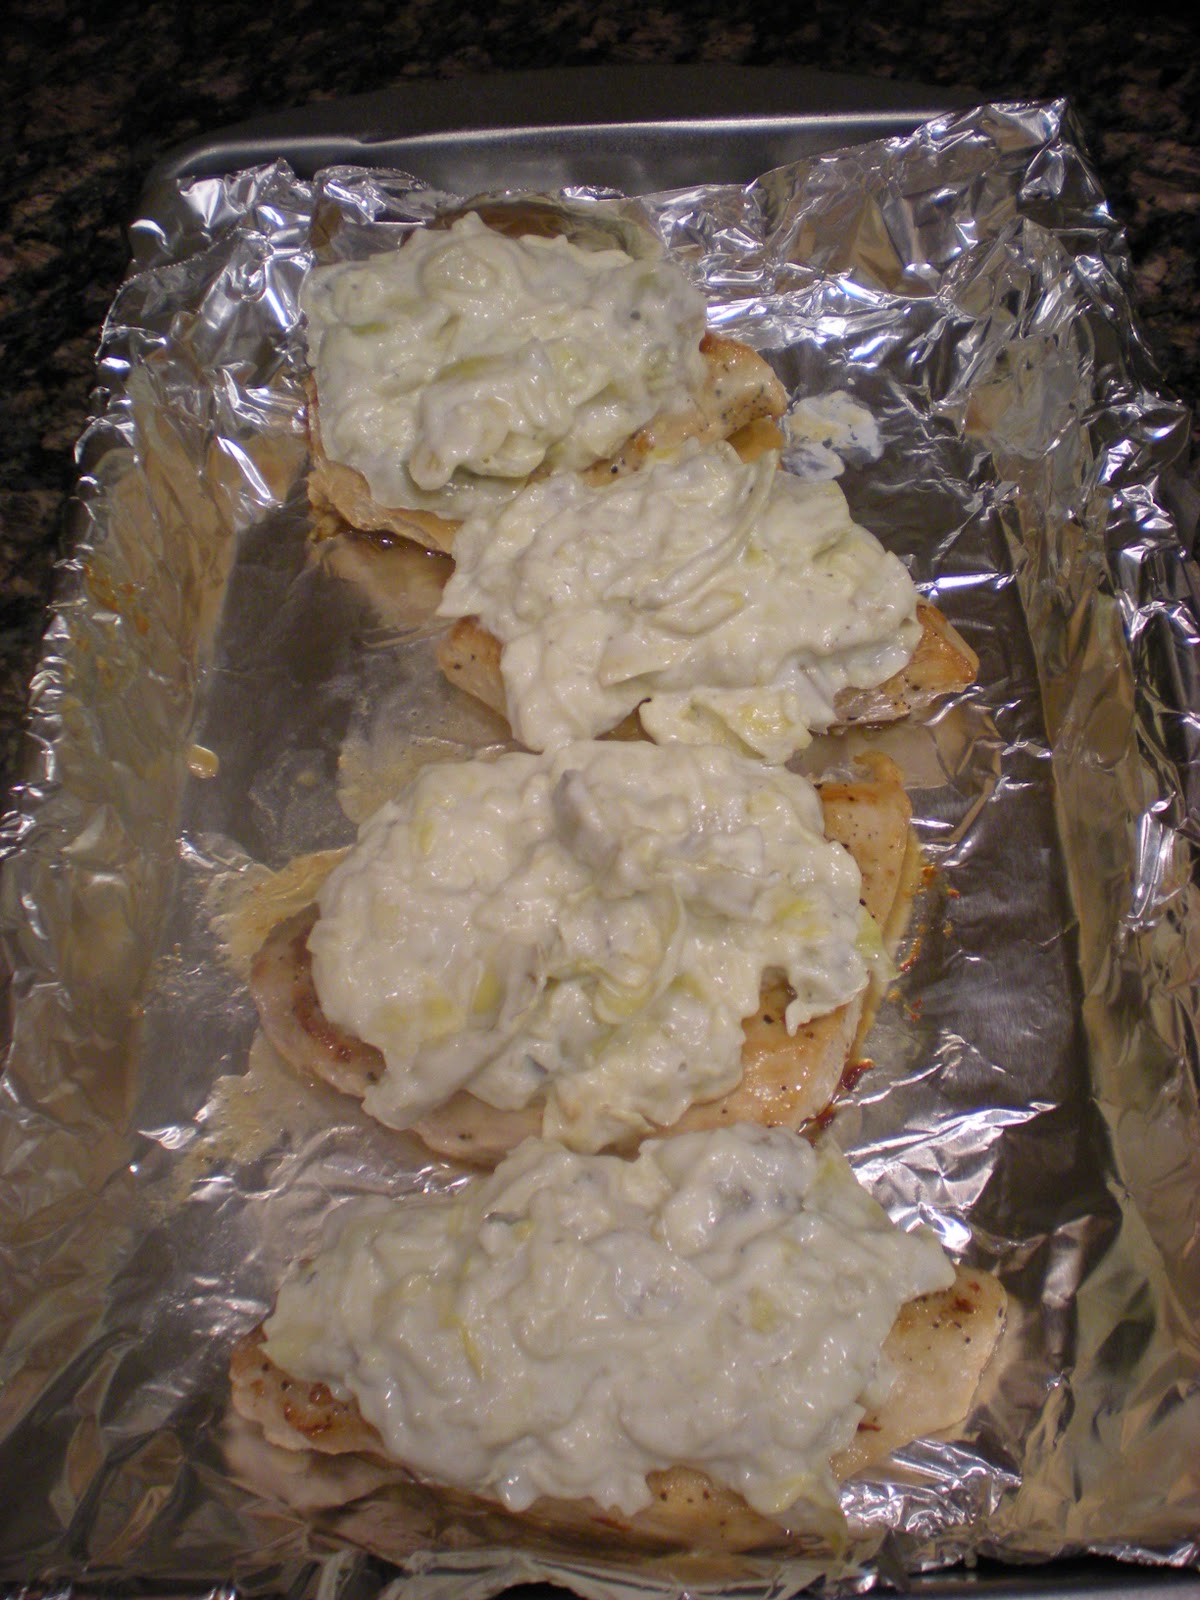
Step 10: Pop them in the oven and let them bake for 7-10 minutes, or until the artichoke mixture on top is melted and starting to achieve a beautiful golden brown color. 
 

Ohmigawd. Would you look at that? 
 

Step 11: Open mouth. Insert fork. Game over. 


To make a complete meal, serve with some steamed veggies and smashed salt&vinegar potatoes (recipe coming soon!) or rice. It doesn't get much better than that!

Hope you enjoy this recipe as much as I do. Thanks for reading!
xoxo

JEN 

Monday, September 26, 2011

End of Summer Pasta Salad

It seems like pasta salad gets a bad rep. People generally think of it as the item that sits out untouched at barbecues and cookouts, slathered  in mayonnaise. 

Well I have news for you. This pasta salad is anything BUT mediocre or mayonnaise-laden. It's bold, bursting with flavor, and made using fresh and healthy ingredients. 


This recipe is an excellent way to take advantage of the last few crops of gorgeous summer tomatoes gracing the supermarket. Hothouse tomatoes that are widely available during the wintertime absolutely pale in comparison as far as color, flavor, and texture. In fact, you are lucky to find cherry or grape tomatoes during the winter months at all. 


Here is what you will need (Makes 4 servings):
  • 1/2 lb of tubular pasta, such as penne or rigatoni (1/2 lb = 1/2 a standard package) 
  • 1 pint of cherry or grape tomatoes
  • 8 oz ricotta cheese (1/2 a standard 16oz container. I used part-skim but you could use full fat or fat free if you wish) 
  • 1/4 cup extra virgin olive oil
  • 10 sprigs of fresh thyme 
  • zest of 2 lemons 
  • freshly cracked pepper
  • salt  


 Step 1: Preheat your oven to 400 degrees and set a large pot of salted water on high to boil on the stovetop. Rinse your cherry tomatoes and thyme thoroughly under running water. Pat them dry with a cloth or paper towel. 


Step 2: Slice your tomatoes in half lengthwise using a very sharp knife. I had to sharpen mine halfway through this step because my knife was squishing the tender 'toms before it was cutting through them. 
 

Here are all my grape tomatoes halved. Pretty as a picture! 


Step 3: Place your halved tomatoes and clean thyme sprigs in a bowl. Drizzle a generous amount of olive oil (1/8th cup or so) and toss to coat. I just use my hands for this.


Step 4: Line a small baking sheet with foil and spray generously with non-stick spray (or, if you don't have it, just drizzle more olive oil on the baking sheet and rub it around with your hands or a paper towel).

Arrange the tomatoes on the baking sheet, cut side up. Drape the thyme sprigs over top. Sprinkle generously with salt and fresh cracked black pepper. Your oven should be preheated by this point, so pop 'em in! These will need to stay in the oven for around 15 minutes, but keep an eye on them.


Step 5: Your water should also be boiling at this point. Dump your half pound of pasta (I used penne) into the boiling water and cook according to package directions. My package directed me to cook it for 11 minutes. 
 

 Step 6: While your tomatoes are roasting, scrub your lemons under running water using a rough sponge to get all the grit off. Zest your lemons into a small bowl - zesting is essentially scraping off the bright yellow rind (I use a fine hand held cheese grater to do this; you could also use the fine side on a box grater or a microplane if you have one). 


The zest (or rind) of citrus fruit house essential oils, which add incredible flavor and depth to food. However, right underneath the bright rind of the fruit is the white, bitter pith. See the spot near the right of the lemon below that is white?


That white spot near the right of the lemon is the pith starting to show through. You don't want that part. Just grate off the very outside of the rind all over the whole lemon - if you keep grating too deep in any one spot, you will start seeing the white bits, which taste very bitter and unpleasant. 


Here is the zest from my two lemons. It probably came out to around 2-3 tablespoons, if you want to get technical.


Step 7: Once your pasta is finished cooking, drain it in a colander and rinse it thoroughly with cold water. You want it to be cool to the touch. 


Step 8: Remove your tomatoes from the oven when they have finished roasting (10-15 minutes). They should look like the picture below - slightly wilted and a little brown on top. 

As you can see, the natural sugars in the tomatoes caramelize during the roasting process, which makes a huge mess when they explode on the surface of the pan (see all the burnt tomato juice on the left side?) . Using foil makes clean-up a lot easier and eliminates the need to scrub a pan covered in burnt food.


 Step 9: Assemble your dish! 

Scoop your desired amount of pasta into a bowl.
Spoon on a few large dollops of ricotta cheese. 
Sprinkle on a teaspoon or so of the lemon zest. 
Drizzle some more olive oil over it. Add your roasted tomatoes on top and a couple sprigs of the roasted thyme (I also added some dried thyme to intensify the flavor, this is completely optional). 
Add a pinch of salt and more fresh cracked black pepper and you're good to go!


 Look how gorgeous this dish is. If you are trying to eat more meatless dishes, this pasta salad could be a great way to incorporate a vegetarian meal into your diet. Also, I used the Barilla Plus Penne (which has added fiber, whole grains, and omega-3's) and part-skim ricotta, making this dish extremely low in saturated fat, and high in fiber and nutrients. 


Not to mention the flavor...roasting the tomatoes makes them incredibly sweet and intense when they burst in your mouth. Try this soon. You won't regret it!


Thanks for reading!
xoxo


JEN